ESP32 Code – Email Web Server
Copy the following code to your Arduino IDE, but don’t upload it yet. You need to make some changes to make it work for you. You need to insert the sender’s email address, the recipient’s email address, your default threshold input and your network credentials.
/*********
Rui Santos
Complete project details at https://RandomNerdTutorials.com/esp32-email-alert-temperature-threshold/
Permission is hereby granted, free of charge, to any person obtaining a copy
of this software and associated documentation files.
The above copyright notice and this permission notice shall be included in all
copies or substantial portions of the Software.
*********/
#include <WiFi.h>
#include <AsyncTCP.h>
#include <ESPAsyncWebServer.h>
#include <OneWire.h>
#include <DallasTemperature.h>
#include "ESP32_MailClient.h"
// REPLACE WITH YOUR NETWORK CREDENTIALS
const char* ssid = "REPLACE_WITH_YOUR_SSID";
const char* password = "REPLACE_WITH_YOUR_PASSWORD";
// To send Emails using Gmail on port 465 (SSL), you need to create an app password: https://support.google.com/accounts/answer/185833
#define emailSenderAccount "example_sender_account@gmail.com"
#define emailSenderPassword "email_sender_password"
#define smtpServer      "smtp.gmail.com"
#define smtpServerPort  465
#define emailSubject "[ALERT] ESP32 Temperature"
// Default Recipient Email Address
String inputMessage = "your_email_recipient@gmail.com";
String enableEmailChecked = "checked";
String inputMessage2 = "true";
// Default Threshold Temperature Value
String inputMessage3 = "25.0";
String lastTemperature;
// HTML web page to handle 3 input fields (email_input, enable_email_input, threshold_input)
const char index_html[] PROGMEM = R"rawliteral(
<!DOCTYPE HTML><html><head>
<title>Email Notification with Temperature</title>
<meta name="viewport" content="width=device-width, initial-scale=1">
</head><body>
<h2>DS18B20 Temperature</h2>
<h3>%TEMPERATURE% °C</h3>
<h2>ESP Email Notification</h2>
<form action="/get">
  Email Address <input type="email" name="email_input" value="%EMAIL_INPUT%" required><br>
  Enable Email Notification <input type="checkbox" name="enable_email_input" value="true" %ENABLE_EMAIL%><br>
  Temperature Threshold <input type="number" step="0.1" name="threshold_input" value="%THRESHOLD%" required><br>
  <input type="submit" value="Submit">
</form>
</body></html>)rawliteral";
void notFound(AsyncWebServerRequest *request) {
request->send(404, "text/plain", "Not found");
}
AsyncWebServer server(80);
// Replaces placeholder with DS18B20 values
String processor(const String& var){
  //Serial.println(var);
  if(var == "TEMPERATURE"){
    return lastTemperature;
  }
  else if(var == "EMAIL_INPUT"){
    return inputMessage;
  }
  else if(var == "ENABLE_EMAIL"){
    return enableEmailChecked;
  }
  else if(var == "THRESHOLD"){
    return inputMessage3;
  }
  return String();
}
// Flag variable to keep track if email notification was sent or not
bool emailSent = false;
const char* PARAM_INPUT_1 = "email_input";
const char* PARAM_INPUT_2 = "enable_email_input";
const char* PARAM_INPUT_3 = "threshold_input";
// Interval between sensor readings. Learn more about timers: https://RandomNerdTutorials.com/esp32-pir-motion-sensor-interrupts-timers/
unsigned long previousMillis = 0;
const long interval = 5000;
// GPIO where the DS18B20 is connected to
const int oneWireBus = 4;
// Setup a oneWire instance to communicate with any OneWire devices
OneWire oneWire(oneWireBus);
// Pass our oneWire reference to Dallas Temperature sensor
DallasTemperature sensors(&oneWire);
// The Email Sending data object contains config and data to send
SMTPData smtpData;
void setup() {
Serial.begin(115200);
WiFi.mode(WIFI_STA);
WiFi.begin(ssid, password);
if (WiFi.waitForConnectResult() != WL_CONNECTED) {
  Serial.println("WiFi Failed!");
  return;
}
Serial.println();
Serial.print("ESP IP Address: http://");
Serial.println(WiFi.localIP());
// Start the DS18B20 sensor
sensors.begin();
// Send web page to client
server.on("/", HTTP_GET, [](AsyncWebServerRequest *request){
  request->send_P(200, "text/html", index_html, processor);
});
// Receive an HTTP GET request at <ESP_IP>/get?email_input=<inputMessage>&enable_email_input=<inputMessage2>&threshold_input=<inputMessage3>
server.on("/get", HTTP_GET, [] (AsyncWebServerRequest *request) {
  // GET email_input value on <ESP_IP>/get?email_input=<inputMessage>
  if (request->hasParam(PARAM_INPUT_1)) {
    inputMessage = request->getParam(PARAM_INPUT_1)->value();
    // GET enable_email_input value on <ESP_IP>/get?enable_email_input=<inputMessage2>
    if (request->hasParam(PARAM_INPUT_2)) {
      inputMessage2 = request->getParam(PARAM_INPUT_2)->value();
      enableEmailChecked = "checked";
    }
    else {
      inputMessage2 = "false";
      enableEmailChecked = "";
    }
    // GET threshold_input value on <ESP_IP>/get?threshold_input=<inputMessage3>
    if (request->hasParam(PARAM_INPUT_3)) {
      inputMessage3 = request->getParam(PARAM_INPUT_3)->value();
    }
  }
  else {
    inputMessage = "No message sent";
  }
Serial.println(inputMessage);
Serial.println(inputMessage2);
Serial.println(inputMessage3);
request->send(200, "text/html", "HTTP GET request sent to your ESP.<br><a href=\"/\">Return to Home Page</a>");
});
server.onNotFound(notFound);
server.begin();
}
void loop() {
unsigned long currentMillis = millis();
if (currentMillis - previousMillis >= interval) {
  previousMillis = currentMillis;
  sensors.requestTemperatures();
  // Temperature in Celsius degrees
  float temperature = sensors.getTempCByIndex(0);
  Serial.print(temperature);
  Serial.println(" *C");

  // Temperature in Fahrenheit degrees
  /*float temperature = sensors.getTempFByIndex(0);
  SerialMon.print(temperature);
  SerialMon.println(" *F");*/

  lastTemperature = String(temperature);
// Check if temperature is above threshold and if it needs to send the Email alert
if(temperature > inputMessage3.toFloat() && inputMessage2 == "true" && !emailSent){
  String emailMessage = String("Temperature above threshold. Current temperature: ") +
                        String(temperature) + String("C");
  if(sendEmailNotification(emailMessage)) {
    Serial.println(emailMessage);
    emailSent = true;
  }
  else {
    Serial.println("Email failed to send");
  }
}
// Check if temperature is below threshold and if it needs to send the Email alert
else if((temperature < inputMessage3.toFloat()) && inputMessage2 == "true" && emailSent) {
  String emailMessage = String("Temperature below threshold. Current temperature: ")
                        + String(temperature) + String(" C");
  if(sendEmailNotification(emailMessage)) {
    Serial.println(emailMessage);
    emailSent = false;
  }
  else {
    Serial.println("Email failed to send");
  }
}
}
}
bool sendEmailNotification(String emailMessage){
// Set the SMTP Server Email host, port, account and password
smtpData.setLogin(smtpServer, smtpServerPort, emailSenderAccount, emailSenderPassword);
// For library version 1.2.0 and later which STARTTLS protocol was supported,the STARTTLS will be
// enabled automatically when port 587 was used, or enable it manually using setSTARTTLS function.
//smtpData.setSTARTTLS(true);
// Set the sender name and Email
smtpData.setSender("ESP32", emailSenderAccount);
// Set Email priority or importance High, Normal, Low or 1 to 5 (1 is highest)
smtpData.setPriority("High");
// Set the subject
smtpData.setSubject(emailSubject);
// Set the message with HTML format
smtpData.setMessage(emailMessage, true);
// Add recipients
smtpData.addRecipient(inputMessage);
smtpData.setSendCallback(sendCallback);
// Start sending Email, can be set callback function to track the status
if (!MailClient.sendMail(smtpData)) {
Serial.println("Error sending Email, " + MailClient.smtpErrorReason());
return false;
}
// Clear all data from Email object to free memory
smtpData.empty();
return true;
}
// Callback function to get the Email sending status
void sendCallback(SendStatus msg) {
// Print the current status
Serial.println(msg.info());
// Do something when complete
if (msg.success()) {
Serial.println("----------------");
}
}
How the Code Works
Continue reading to learn how the code works, or skip to the demonstration section.
Libraries
Start by importing the required libraries. The WiFi, AsyncTCP and ESPAsyncWebServer are required to build the web server. The OneWire and DallasTemperature are required to interface with the DS18B20 and the ESP32_MailClient is required to send emails with the ESP32 via SMTP server.
#include <WiFi.h>
#include <AsyncTCP.h>
#include <ESPAsyncWebServer.h>
#include <OneWire.h>
#include <DallasTemperature.h>
#include "ESP32_MailClient.h"
Network Credentials
Insert your network credentials in the following lines:
// REPLACE WITH YOUR NETWORK CREDENTIALS
const char* ssid = "REPLACE_WITH_YOUR_SSID";
const char* password = "REPLACE_WITH_YOUR_PASSWORD";
Email Settings
Insert the sender email – this is the email that will be used to send emails by the ESP32.
#define emailSenderAccount "example_sender_account@gmail.com"
Type the email sender password:
#define emailSenderPassword "email_sender_password"
In the next lines, insert the email sender SMTP server settings. We’re using a Gmail account. If you’re using another email provider you need to insert the right server settings.
#define smtpServer "smtp.gmail.com"
#define smtpServerPort 465
Insert the email subject on the following line:
#define emailSubject "[ALERT] ESP32 Temperature"
Auxiliar Variables
Next, we have some auxiliar variables to save the values submitted through the form. The inputMessage variable holds the recipient’s email. You can insert the default’s recipient’s email. You can change the recipient’s email later on the form.
String inputMessage = "your_email_recipient@gmail.com";
The enableEmailChecked variable will tell us whether the checkbox to send an email is checked or not.
String enableEmailChecked = "checked";
In case it’s checked, the value saved on the inputMessage2 should be set to true.
String inputMessage2 = "true";
The inputMessage3 holds the temperature threshold value. By default is set to 25.0ºC, but you can set it to any other default value that makes more sense to you. You can also change it later in the HTML form.
String inputMessage3 = "25.0";
The lastTemperature variable saves the last temperature value to compare with the current value.
String lastTemperature;
HTML Text
Then, we have some basic HTML text to build a page with three input fields: the recipient’s email, a checkbox to enable or disable email notifications and the temperature threshold input field. The web page also displays the latest temperature reading from the DS18B20 temperature sensor.
The following lines display the temperature:
<h2>DS18B20 Temperature</h2>
<h3>%TEMPERATURE% °C</h3>
The %TEMPERATURE% is placeholder that will be replaced by the actual temperature value when the ESP32 serves the page.
Then, we have a form with three input fields and a “Submit” button. When the user types some data and clicks the “Submit” button, those values are sent to the ESP32 to update the variables.
<form action="/get">
Email Address <input type="email" name="email_input" value="%EMAIL_INPUT%" required><br>
Enable Email Notification <input type="checkbox" name="enable_email_input" value="true" %ENABLE_EMAIL%><br>
Temperature Threshold <input type="number" step="0.1" name="threshold_input" value="%THRESHOLD%" required><br>
<input type="submit" value="Submit">
</form>
The first input field is of type email, the second input field is a checkbox and the last input field is of type number. To learn more about input fields, we recommend taking a look at following resources of the w3schools website:
The action attribute of the form specifies where to send the data inserted on the form after pressing submit. In this case, it makes an HTTP GET request to:
/get?email_input=value&enable_email_input=value&threshold_input=value
The value refers to the text you enter in each of the input fields. To learn more about handling input fields with the ESP32, read: Input Data on HTML Form ESP32 Web Server using Arduino IDE.
processor()
The processor() function replaces all placeholders in the HTML text with the actual values.
- %TEMPERATURE% » lastTemperature
- %EMAIL_INPUT% » inputMessage
- %ENABLE_EMAIL% » enableEmailChecked
- %THRESHOLD% » inputMessage3
String processor(const String& var){
//Serial.println(var);
if(var == "TEMPERATURE"){
return lastTemperature;
}
else if(var == "EMAIL_INPUT"){
return inputMessage;
}
else if(var == "ENABLE_EMAIL"){
return enableEmailChecked;
}
else if(var == "THRESHOLD"){
return inputMessage3;
}
return String();
}
Input Field Parameters
The following variables will be used to check whether we’ve received an HTTP GET request from those input fields and save the values into variables accordingly.
const char* PARAM_INPUT_1 = "email_input";
const char* PARAM_INPUT_2 = "enable_email_input";
const char* PARAM_INPUT_3 = "threshold_input";
DS18B20 Temperature Sensor Init
Initialize the DS18B20 temperature sensor.
// GPIO where the DS18B20 is connected to
const int oneWireBus = 4;
// Setup a oneWire instance to communicate with any OneWire devices
OneWire oneWire(oneWireBus);
// Pass our oneWire reference to Dallas Temperature sensor
DallasTemperature sensors(&oneWire);
To learn more about interfacing the DS18B20 temperature sensor with the ESP32, read: ESP32 DS18B20 Temperature Sensor with Arduino IDE.
SMTPData Object
The smtpData object contains configurations and data to be sent via email. These configurations are set later on the sendEmailNotification() function.
SMTPData smtpData;
setup()
In the setup(), connect to Wi-Fi in station mode and print the ESP32 IP address:
Serial.begin(115200);
WiFi.mode(WIFI_STA);
WiFi.begin(ssid, password);
if (WiFi.waitForConnectResult() != WL_CONNECTED) {
Serial.println("WiFi Failed!");
return;
}
Serial.println();
Serial.print("ESP IP Address: http://");
Serial.println(WiFi.localIP());
Initialize the DS18B20 temperature sensor:
sensors.begin();
Handle Web Server
Then, define what happens when the ESP32 receives HTTP requests. When we get a request on the root / url, send the HTML text with the processor (so that the placeholders are replaced with the latest values).
server.on("/", HTTP_GET, [](AsyncWebServerRequest *request){
request->send_P(200, "text/html", index_html, processor);
});
When a form is submitted, the ESP32 receives a request on the following URL:
<ESP_IP>/get?email_input=<inputMessage>&enable_email_input=<inputMessage2>&threshold_input=<inputMessage3>
So, we check whether the request contains input parameters, and save those parameters into variables:
server.on("/get", HTTP_GET, [] (AsyncWebServerRequest *request) {
// GET email_input value on <ESP_IP>/get?email_input=<inputMessage>
if (request->hasParam(PARAM_INPUT_1)) {
inputMessage = request->getParam(PARAM_INPUT_1)->value();
// GET enable_email_input value on <ESP_IP>/get?enable_email_input=<inputMessage2>
if (request->hasParam(PARAM_INPUT_2)) {
inputMessage2 = request->getParam(PARAM_INPUT_2)->value();
enableEmailChecked = "checked";
}
else {
inputMessage2 = "false";
enableEmailChecked = "";
}
// GET threshold_input value on <ESP_IP>/get?threshold_input=<inputMessage3>
if (request->hasParam(PARAM_INPUT_3)) {
inputMessage3 = request->getParam(PARAM_INPUT_3)->value();
}
}
else {
inputMessage = "No message sent";
}
This is the part of the code where the variables will be replaced with the values submitted on the form. The inputMessage variable saves the recipient’s email address, the inputMessage2 saves whether the email notification system is enabled or not and the inputMessage3 saves the temperature threshold.
After submitting the values on the form, it displays a new page saying the request was successfully sent to the ESP32 with a link to return to the homepage.
request->send(200, "text/html", "HTTP GET request sent to your ESP.<br><a href=\"/\">Return to Home Page</a>");
});
Finally, start the server:
server.begin();
loop()
In the loop(), we use timers to get new temperature readings every 5 seconds.
unsigned long currentMillis = millis();
if (currentMillis - previousMillis >= interval) {
previousMillis = currentMillis;
sensors.requestTemperatures();
// Temperature in Celsius degrees
float temperature = sensors.getTempCByIndex(0);
Serial.print(temperature);
Serial.println(" *C");
// Temperature in Fahrenheit degrees
/*float temperature = sensors.getTempFByIndex(0);
SerialMon.print(temperature);
SerialMon.println(" *F");*/
lastTemperature = String(temperature);
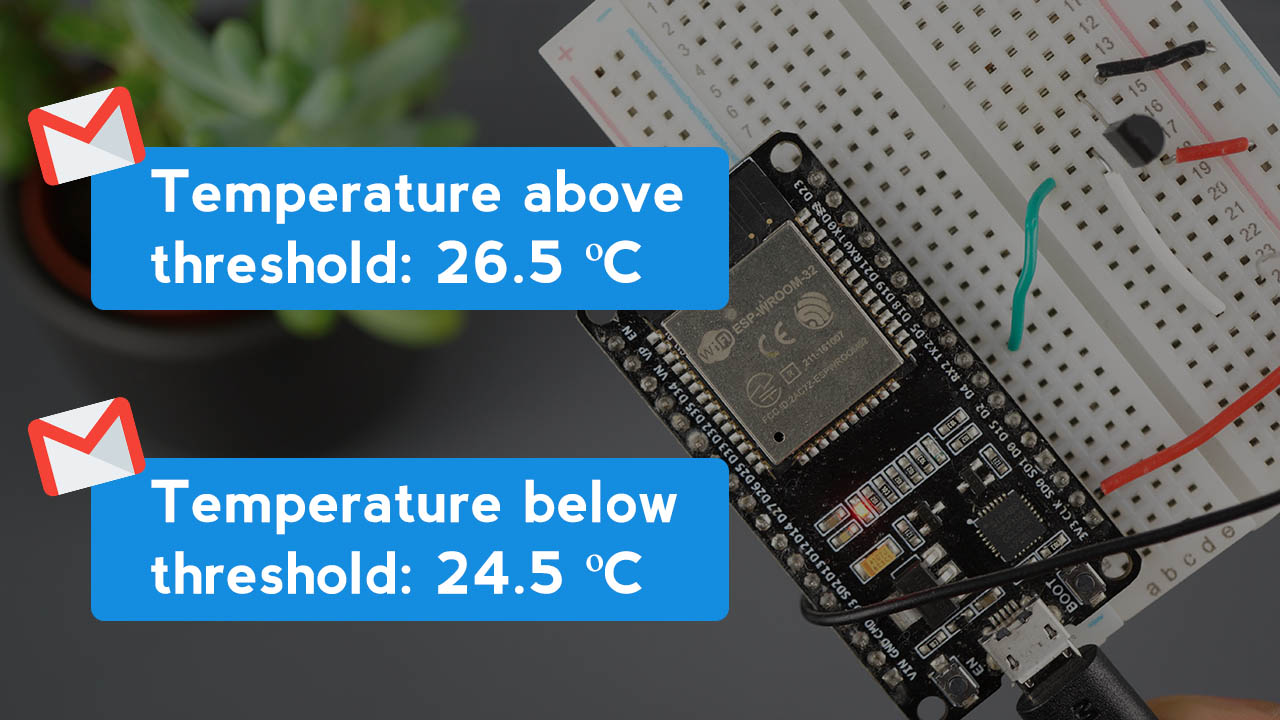
After getting a new temperature reading, we check whether it is above or below the threshold and send an email if necessary.
You’ll send an email alert, if all these conditions are met:
- The current temperature is above the threshold;
- Email notifications are enabled (the checkbox is ticked on the web page);
- If an email hasn’t been sent yet.
if(temperature > inputMessage3.toFloat() && inputMessage2 == "true" && !emailSent){
String emailMessage = String("Temperature above threshold. Current temperature: ") +
String(temperature) + String("C");
if(sendEmailNotification(emailMessage)) {
Serial.println(emailMessage);
emailSent = true;
}
else {
Serial.println("Email failed to send");
}
}
The email contains a message saying the temperature is above the threshold and the current temperature.
Then, if the temperature goes below the threshold, send another email.
else if((temperature < inputMessage3.toFloat()) && inputMessage2 == "true" && emailSent) {
String emailMessage = String("Temperature below threshold. Current temperature: ")
+ String(temperature) + String(" C");
if(sendEmailNotification(emailMessage)) {
Serial.println(emailMessage);
emailSent = false;
}
else {
Serial.println("Email failed to send");
}
}
To send emails, we’ve created the sendEmailNotification function that contains all the details to send the email. This function returns true if the email was successfully sent, or false if it failed. To learn more about sending emails via SMTP Server with the ESP32, read: ESP32 Send Emails using an SMTP Server.
Demonstration
Upload the code to your ESP32 board (with the DS18B20 wired to your ESP32 board).