In this guide, you’ll learn how to create a basic Raspberry Pi Pico local web server to control outputs and fetch data. As an example, we’ll create a web page to control an LED on and off and fetch some random values generated by the Pico. This example can be easily modified or extended to control multiple outputs and fetch data from sensors instead of random numbers.

Table of Contents
This tutorial covers the following topics:
Prerequisites – Micro Python Firmware
To follow this tutorial you need MicroPython firmware installed in your Raspberry Pi Pico board. You also need an IDE to write and upload the code to your board.
The recommended MicroPython IDE for the Raspberry Pi Pico is Thonny IDE. Follow the next tutorial to learn how to install Thonny IDE, flash MicroPython firmware, and upload code to the board.
Introducing Basic Concepts
The Raspberry Pi Pico as a Web Server
In simple terms, a web server is a “computer” that provides web pages. It stores the website’s files, including all HTML documents and related assets like images, CSS style sheets, fonts, and/or other files. It also brings those files to the user’s web browser device when the user makes a request to the server.

When using the Raspberry Pi Pico as a web server, you’re essentially turning it into a small computer that stores and provides web pages. As users access a web page, their browsers send requests to the Pico using Hypertext Transfer Protocol (HTTP). The Pico then responds by sending back the requested web page.
Client and Server
When you type a URL in your browser, in the background, you (the client) send a request via Hypertext Transfer Protocol (HTTP) to a server. When the server receives the request, it sends a response through HTTP, and you will see the web page requested in your browser. Clients and servers communicate over a computer network.
In simple terms, clients make requests to servers. Servers handle the clients’ requests. In this particular tutorial, the Raspberry Pi Pico will be the server, and you (your browser) will be the client.
Ip Address
An IP address is a numerical label assigned to each device connected to a computer network. It is a series of four values separated by periods with each value ranging from 0 to 255. Here’s an example:
192.168.1.75
At home, your devices are connected to a private network through your router (local network). All devices connected to your router are part of your local network. Inside this network, each device has its own IP address.
Devices that are connected to the same router can access each other via the IP address. Devices outside your local network can’t access your local devices using their local IP address.
When you connect your Raspberry Pi Pico to your router, it becomes part of your local network. So, it will be assigned a unique local IP address and you can access it from your computer on your local network.
Sockets
We’ll create our web server using sockets and the Python socket API.
Sockets and the socket API are used to send messages across a network. They provide a form of inter-process communication (IPC).
Sockets can be used in client-server applications, where one side acts as the server and waits for connections from clients – that’s what we’ll do here (the Raspberry Pi Pico is a server waiting for connections from clients).
Project Overview
Before going straight to the project, it is important to outline what our web server will do so that it is easier to understand how everything works.
We’ll create a simple web page with two buttons to control the Raspberry Pi Pico onboard LED on and off. The web page also has another button to request a new random value (this can easily be modified to request sensor readings).

Here’s a quick explanation of how everything works.
When you enter the Raspberry Pi Pico address on your web browser, you’re making a request to the Raspberry Pi Pico on the root (/) URL. When it receives that request, it responds with the HTML to build the web page we’ve seen previously.

When you click on the Light on button, it makes a request on the /lighton? URL. When it receives that request, it turns the onboard LED on and sends the web page with the updated LED state.
When you click on the Light off button, a request is made on the /lightoff? URL. When that happens, it will turn off the LED and send the web page with the current LED state.

Finally, we also have a button to request a random value from the Raspberry Pi Pico. This can be easily modified to request sensor readings or any other useful piece of information. That button sends a request on the /value? URL. When the Pico receives that request, it generates a new random value and sends the HTML page updated with that new value.

The HTML Page
Below you can find the HTML we’ll use to build the web page:
    Pico Web Server


    Raspberry Pi Pico Web Server
    Led Control


    LED state: {state}
    Fetch New Value


    Fetched value: {random_value}
In this particular example, we’ll save the contents of the HTML file in a variable in our MicroPython script (but, it can also be saved in a file in the Raspberry Pi Pico filesystem—not covered in this tutorial).
This HTML structure creates a basic web page for controlling an LED and fetching a random value, for interaction with a Raspberry Pi Pico web server.
The {state} and {random_value} variables are meant to be dynamically populated with values from the server-side logic.
In summary, this HTML creates three different forms with buttons.
Raspberry Pi Pico Web Server – MicroPython Script
Create a new file in Thonny IDE and copy the following code.
# Import necessary modules
import network
import socket
import time
import random
from machine import Pin

# Create an LED object on pin 'LED'
led = Pin('LED', Pin.OUT)

# Wi-Fi credentials
ssid = 'REPLACE_WITH_YOUR_SSID'
password = 'REPLACE_WITH_YOUR_PASSWORD'

# HTML template for the webpage
def webpage(random_value, state):
    html = f"""


            Pico Web Server


            Raspberry Pi Pico Web Server
            Led Control


            LED state: {state}
            Fetch New Value


            Fetched value: {random_value}


        """
    return str(html)

# Connect to WLAN
wlan = network.WLAN(network.STA_IF)
wlan.active(True)
wlan.connect(ssid, password)

# Wait for Wi-Fi connection
connection_timeout = 10
while connection_timeout > 0:
    if wlan.status() >= 3:
        break
    connection_timeout -= 1
    print('Waiting for Wi-Fi connection...')
    time.sleep(1)

# Check if connection is successful
if wlan.status() != 3:
    raise RuntimeError('Failed to establish a network connection')
else:
    print('Connection successful!')
    network_info = wlan.ifconfig()
    print('IP address:', network_info[0])

# Set up socket and start listening
addr = socket.getaddrinfo('0.0.0.0', 80)[0][-1]
s = socket.socket()
s.setsockopt(socket.SOL_SOCKET, socket.SO_REUSEADDR, 1)
s.bind(addr)
s.listen()

print('Listening on', addr)

# Initialize variables
state = "OFF"
random_value = 0

# Main loop to listen for connections
while True:
    try:
        conn, addr = s.accept()
        print('Got a connection from', addr)

        # Receive and parse the request
        request = conn.recv(1024)
        request = str(request)
        print('Request content = %s' % request)

        try:
            request = request.split()[1]
            print('Request:', request)
        except IndexError:
            pass

        # Process the request and update variables
        if request == '/lighton?':
            print("LED on")
            led.value(1)
            state = "ON"
        elif request == '/lightoff?':
            led.value(0)
            state = 'OFF'
        elif request == '/value?':
            random_value = random.randint(0, 20)

        # Generate HTML response
        response = webpage(random_value, state)

        # Send the HTTP response and close the connection
        conn.send('HTTP/1.0 200 OK\r\nContent-type: text/html\r\n\r\n')
        conn.send(response)
        conn.close()

    except OSError as e:
        conn.close()
        print('Connection closed')
You just need to insert your SSID and password on the following variables and the code should work straight away.
# Wi-Fi credentials
ssid = 'REPLACE_WITH_YOUR_SSID'
password = 'REPLACE_WITH_YOUR_PASSWORD'
How does the Code Work?
Continue reading to learn how the code works, or skip to the Demonstration section.
Importing Libraries
Start by importing the required modules, including network for Wi-Fi, socket for communication between client and server, time for delays, random for generating random numbers, and Pin from machine for GPIO pin control.
import network
import socket
import time
import random
from machine import Pin
Declaring the LED Pin
Create a Pin object named led that corresponds to the Raspberry Pi Pico onboard LED. It’s configured as an output pin. It will interpret ‘LED’ as the onboard LED.
led = Pin('LED', Pin.OUT)
Set the Wi-Fi credentials for the network you want to connect to. Modify these variables with your own credentials.
# Wi-Fi credentials
ssid = 'REPLACE_WITH_YOUR_SSID'
password = 'REPLACE_WITH_YOUR_PASSWORD'
Creating the Web Page
To generate the web page, we created a function called webpage() that accepts as arguments a random value and the LED state. We’re generating the web page in a function because it allows us to dynamically change its content at the time of sending it to the client. This way, we can send the page with the latest information about the GPIO state or random value.
# HTML template for the webpage
def webpage(random_value, state):
    html = f"""


            Pico Web Server


            Raspberry Pi Pico Web Server
            Led Control


            LED state: {state}
            Fetch New Value


            Fetched value: {random_value}


        """
    return str(html)
To better understand how this works and the usage of f-strings along with curly braces {} to include variables in the HTML string, continue reading.
The triple quotes (“””) are used to create a multi-line string. This allows for easy formatting of the HTML content without needing to concatenate multiple strings. Our HTML content is more readable this way, but you can concatenate everything on the same line if you want to.
The f before the opening triple quote denotes an f-string, which is a way to embed expressions inside string literals. In this case, it allows the inclusion of variables (random_value and state) directly within the string.
html = f"""
The curly braces {} inside the f-string act as placeholders for variables. The variables inside the curly braces are replaced with their actual values during the string formatting.
In summary, the {state} and {random_value} within the HTML content are placeholders for the actual values of the state and random_value variables.
LED state: {state}
Fetched value: {random_value}
This dynamic string formatting makes it easy to incorporate variable values directly into the HTML content, providing a clean and readable way to generate dynamic web pages.
When we call this function, it will return an HTML page with the current random value and LED state.
Connecting to the Internet
The following lines are responsible for connecting your Raspberry Pi Pico to your local network using the SSID and password you defined earlier.
# Connect to WLAN
wlan = network.WLAN(network.STA_IF)
wlan.active(True)
wlan.connect(ssid, password)
Wait for the Wi-Fi connection to be established. It checks the connection status, and if it’s wlan.status() >= 3 (this means it has even connected to the network or failed to connect), the loop exits. It waits for a maximum of 10 seconds.
The method wlan.status, as the name suggests, checks the status of the Wi-Fi connection of the Raspberry Pi. This method returns an integer with the following meaning:
- 0: WLAN is not enabled
- 1: WLAN is currently scanning for networks
- 2: WLAN is connecting to a network
- 3: WLAN is connected to a network
- 4: WLAN failed to connect to a network
Then, we check if it’s connected or not (we know that status = 3 means it’s connected). If wlan.status() is different than 3, we know it failed to establish a connection.
Otherwise, it means we succeed. In case we succeed, we can get the network information using the ifconfig() method. This method returns a tupple with the following information:
network_info[0]: The IP address assigned to the Pico on the network.
network_info[1]: The subnet mask.
network_info[2]: The gateway IP address.
network_info[3]: The DNS (Domain Name System) server IP address.
We just need the IP address, so we just get the first element of the array (network_info[0]).
else:
    print('Connection successful!')
    network_info = wlan.ifconfig()
    print('IP address:', network_info[0])
Creating a socket server
After establishing a connection with our network, we need to create a listening socket to listen for incoming requests and send the HTML text in response. For a better understanding, the following figure shows a diagram of how to create sockets for server-client interaction:

Set up a socket to listen on port 80. It uses the 0.0.0.0 address, indicating that it will listen on all available network interfaces. The SO_REUSEADDR option allows the socket to reuse the address (this way you won’t have problems with addresses already in use when you try to run the webserver after the first time).
addr = socket.getaddrinfo('0.0.0.0', 80)[0][-1]
s = socket.socket()
s.setsockopt(socket.SOL_SOCKET, socket.SO_REUSEADDR, 1)
s.bind(addr)
s.listen()
The following line gets information about the socket address, specifically the address and port.
addr = socket.getaddrinfo('0.0.0.0', 80)[0][-1]
Create a socket using socket.socket().
s = socket.socket()
Next, bind the socket to an address (network interface and port number) using the bind() method. The bind() method accepts a tupple variable with the ip address, and port number, that we saved previously on the addr variable:
s.bind(addr)
Put the socket into listening mode. This means it’s now ready to accept incoming connections.
s.listen()
Initializing Variables
Initialize variables for the LED state (state) and for the random value (random_value).
# Initialize variables
state = "OFF"
random_value = 0
Listening for Connections
In the while loop, we listen for requests and send responses. When a client connects, the server calls the accept() method to accept the connection. When a client connects, it saves a new socket object to accept and send data on the conn variable, and saves the client address to connect to the server on the addr variable.
conn, addr = s.accept()
Then, print the address of the client saved on the addr variable.
print('Got a connection from', addr)
The data is exchanged between the client and server using the send() and recv() methods.
The following line gets the request received on the newly created socket and saves it in the request variable.
request = conn.recv(1024)
The recv() method receives the data from the client socket (remember that we’ve created a new socket object on the conn variable). The argument of the recv() method specifies the maximum amount of data that can be received at once in bytes.
The next line simply prints the content of the request:
print('Request content = %s' % request)
Get the Request Content
Then, we get the content of the request with request.split()[1]. It splits the received HTTP request string into a list of words and takes the second element (index 1) of the list. This is typically the path part of the HTTP request, which is the information that we need to know which button was clicked on the web interface.
try:
    request = request.split()[1]
    print('Request:', request)
except IndexError:
    pass
Process the requests
We then check the contents of the request and act accordingly. If the request is on the /lighton? path, we turn the LED on and update the state variable to ‘ON’.
if request == '/lighton?':
    print("LED on")
    led.value(1)
    state = "ON"
If the request is /lightoff?, we turn the LED off and update the state variable to ‘OFF’.
elif request == '/lightoff?':
    led.value(0)
    state = 'OFF'
Finally, if the request is on the /value? path, we generate a new random value and save it on the random_value variable.
elif request == '/value?':
    random_value = random.randint(0, 20)
As we’ve mentioned previously, instead of generating a random value, you can get sensor readings.
Sending the Response
After processing the request, we’ll call the webpage() function with random_value and state as arguments to generate an HTML page with the updated values. The content to generate the web page is saved on the response variable.
response = webpage(random_value, state)
Finally, send the response to the socket client using the send() method:
conn.send('HTTP/1.0 200 OK\r\nContent-type: text/html\r\n\r\n')
conn.send(response)
In the end, close the created socket.
conn.close()
Raspberry Pi Pico Web Server – Demonstration
Run the previous code on your Raspberry Pi Pico. You just need to click on the Thonny IDE green run button.

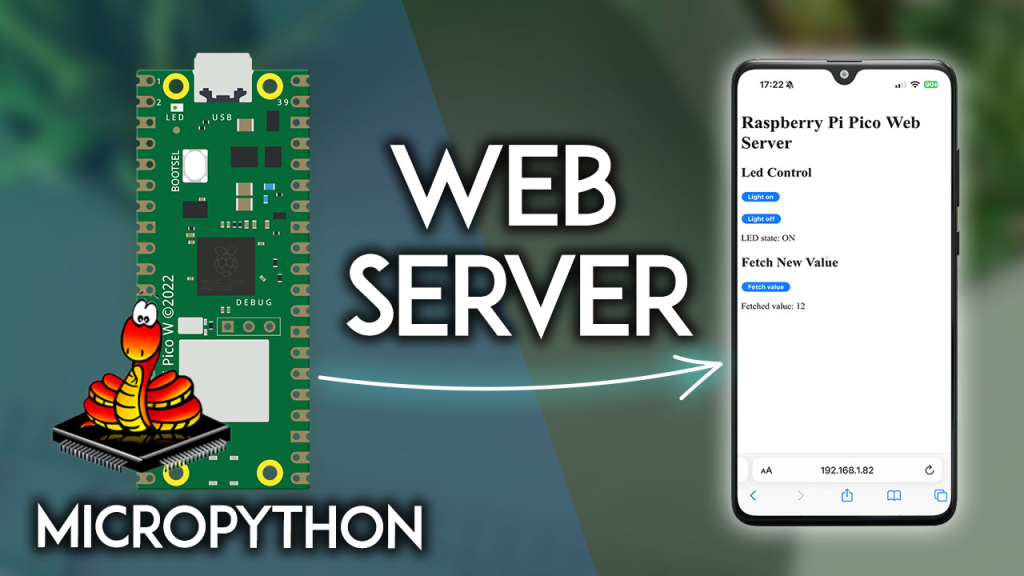
The Raspberry Pi IP address will be printed after a few seconds. In my case, it’s 192.168.1.82.

Open a web browser on your local network and type your Raspberry Pi Pico IP address. The following web page should load.

You can click the Light on and Light off buttons to turn the Raspberry Pi Pico onboard LED on and off.


You can also click on the Fetch value to request a new random generated value from the Raspberry Pi Pico. It should respond with the web page containing the newest value.

You can easily modify the web server to request sensor readings or any other useful information.
The web server is also accessible from your smartphone as long as it is connected to the same network.

If you want the Raspberry Pi Pico to run the webserver without being connected to your computer, you need to upload the code as main.py to the Raspberry Pi Pico filesystem. For that, after copying the code to a new file, go to File > Save as and select Raspberry Pi Pico.

Name the file main.py and click OK to save the file on the Raspberry Pi Pico. Now, it will run the main.py file on boot without the need to be connected to the computer.